13. How to use Simple Image Access (SIA)
RSP Aspect: Portal
Contact authors: Greg Madejski
Last verified to run: 2025-05-28
Targeted learning level: beginner
Introduction: This tutorial demonstrates how to use the Simple Image Access (SIA) service to retrieve DP0.2 images. Specifically it retrieves all “calexps” (Processed Visit Images) containing a specific location on the sky during the desired range of observation epochs.
1. Execute an image query.
Go to data.lsst.cloud , select the Portal Aspect, and click on the SIAv2 Searches box.
To the right of “Select SIAv2 Service” select the “LSST SIAV2 DP0.2 DC2” from the menu (it should be the default).
2. Select the location contained in the images to be retrieved. Check the “Spatial” box and in the “Coordinates or Object Name” enter the desired coordinates. This example uses 62.0, -37.0 for RA and Dec. For “Shape Type select “Cone Shape.” For “Radius” select 10 arcseconds.
3. Select the Observation Type and Source. Check the box for the “Observation Type and Source”. In the drop-down menu, for “Calibration Level” select “Calibrated science-ready data (2)”. For the “Data Product Type” select “image”, for “Instrument Name” select “LSSTCam-imSim”, for the “Facility” select “Rubin-LSST”, and for “Collection” select “LSST.DP0.2”.
4. Select the desired range of observation times.
Check the “Timing” box and for the “Time of Observation” select “Overlapping specified range”.
Select “MJD values” and enter 60000 for the “Start Time” and 60180 for the “End Time”.
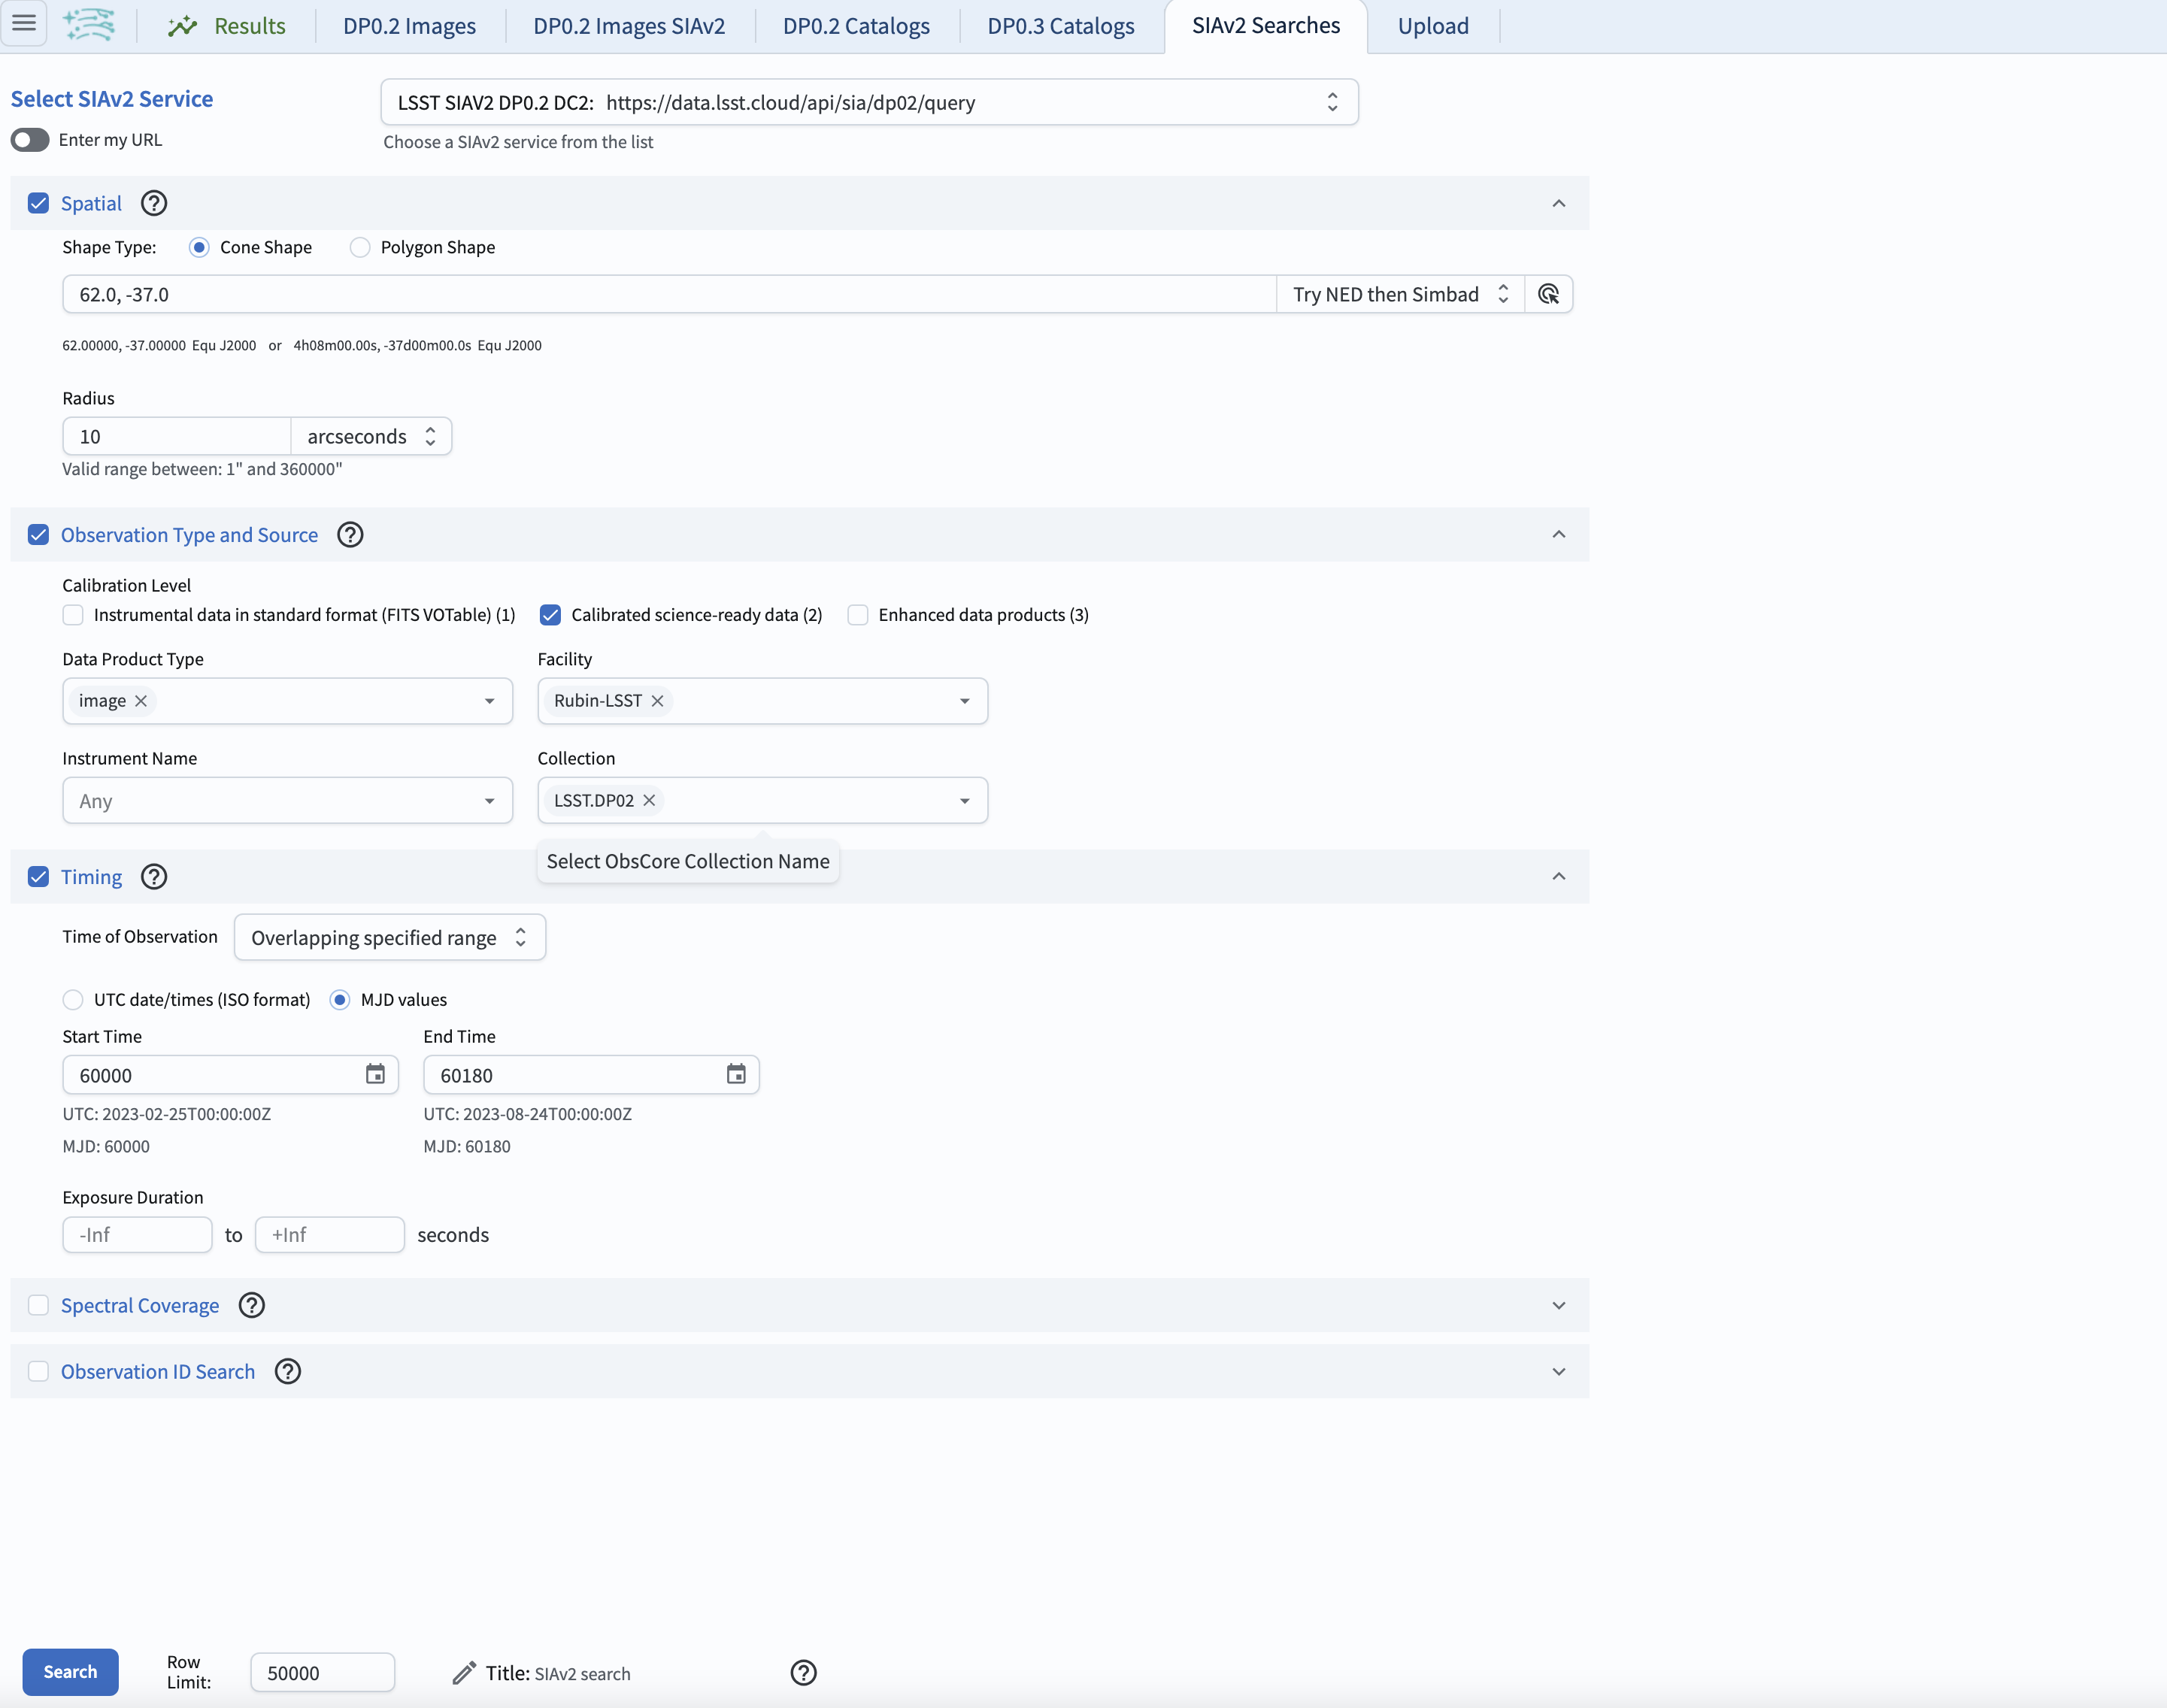
Figure 1: The screenshot of the window containing all parameters and ready to execute the search.
5. Retrieve the images. Click on the “Search” button. This will result in extracting 19 images meeting the selected criteria. By default, the displayed image on the upper left is the first one in the table of images on the bottom of the screen. The plot on the upper right will display the pointing directions of the telescope for individual images.
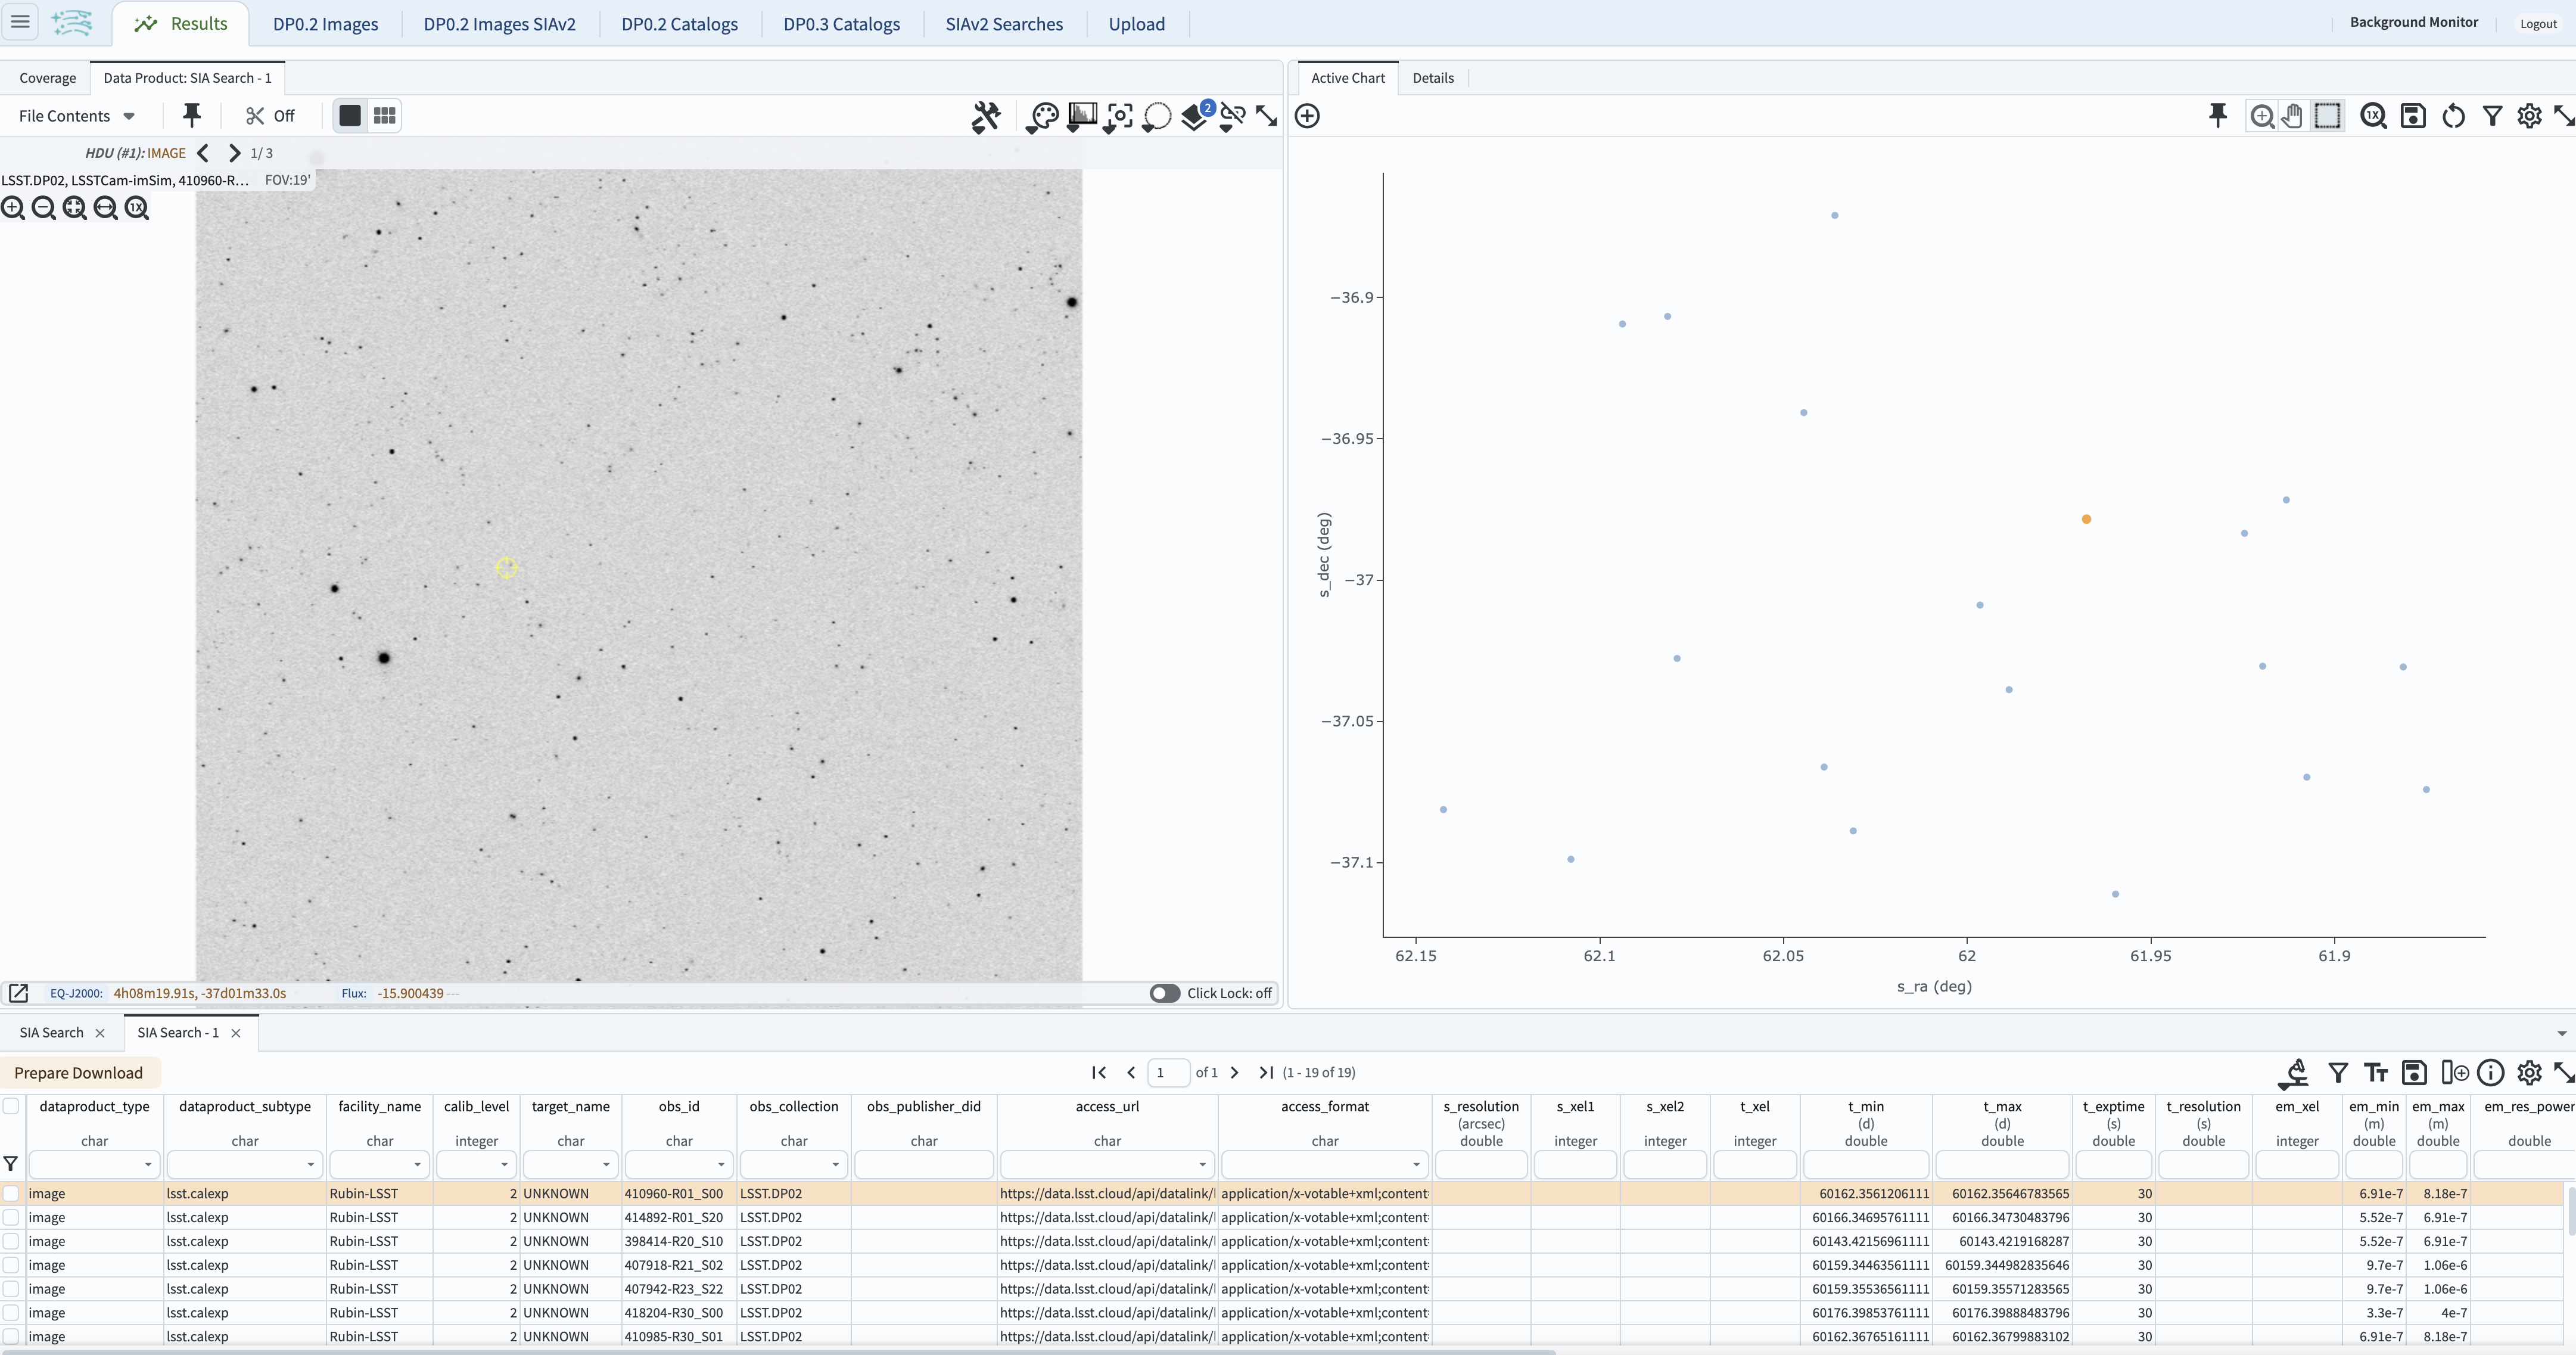
Figure 2: The screenshot of the window resulting from the execution of the search with parameters as in Figure 1.
6. Examine the images. Click on any line in the table - this will result in displaying the image corresponding to the table entry. Click on any point on the scatter plot on the right - this also will display the corresponding image.
Return to the list of DP0.2 Portal tutorials.