09.2. How to add a column to the results table
RSP Aspect: Portal
Contact authors: Greg Madejski and Melissa Graham
Last verified to run: 2025-02-04
Targeted learning level: beginner
Introduction: This tutorial demonstrates how to derived new columns from retrieved columns in the Portal results tab.
1. Execute a query. Go to the Portal’s DP0.2 Catalogs tab, switch to the ADQL interface, and execute the query below. This query will retrieve a small sample of point-like objects (stars) brighter than 25th magnitude (as in preceding tutorials).
SELECT coord_dec, coord_ra, detect_isPrimary, refExtendedness,
       u_cModelFlux, g_cModelFlux, r_cModelFlux,
       i_cModelFlux, z_cModelFlux, y_cModelFlux
FROM dp02_dc2_catalogs.Object
WHERE CONTAINS(POINT('ICRS', coord_ra, coord_dec),
      CIRCLE('ICRS', 62, -37, 0.167)) =1
      AND (detect_isPrimary =1 AND refExtendedness =1
           AND u_cModelFlux >360 AND g_cModelFlux >360
           AND r_cModelFlux >360 AND i_cModelFlux >360
           AND z_cModelFlux >360 AND y_cModelFlux >360)
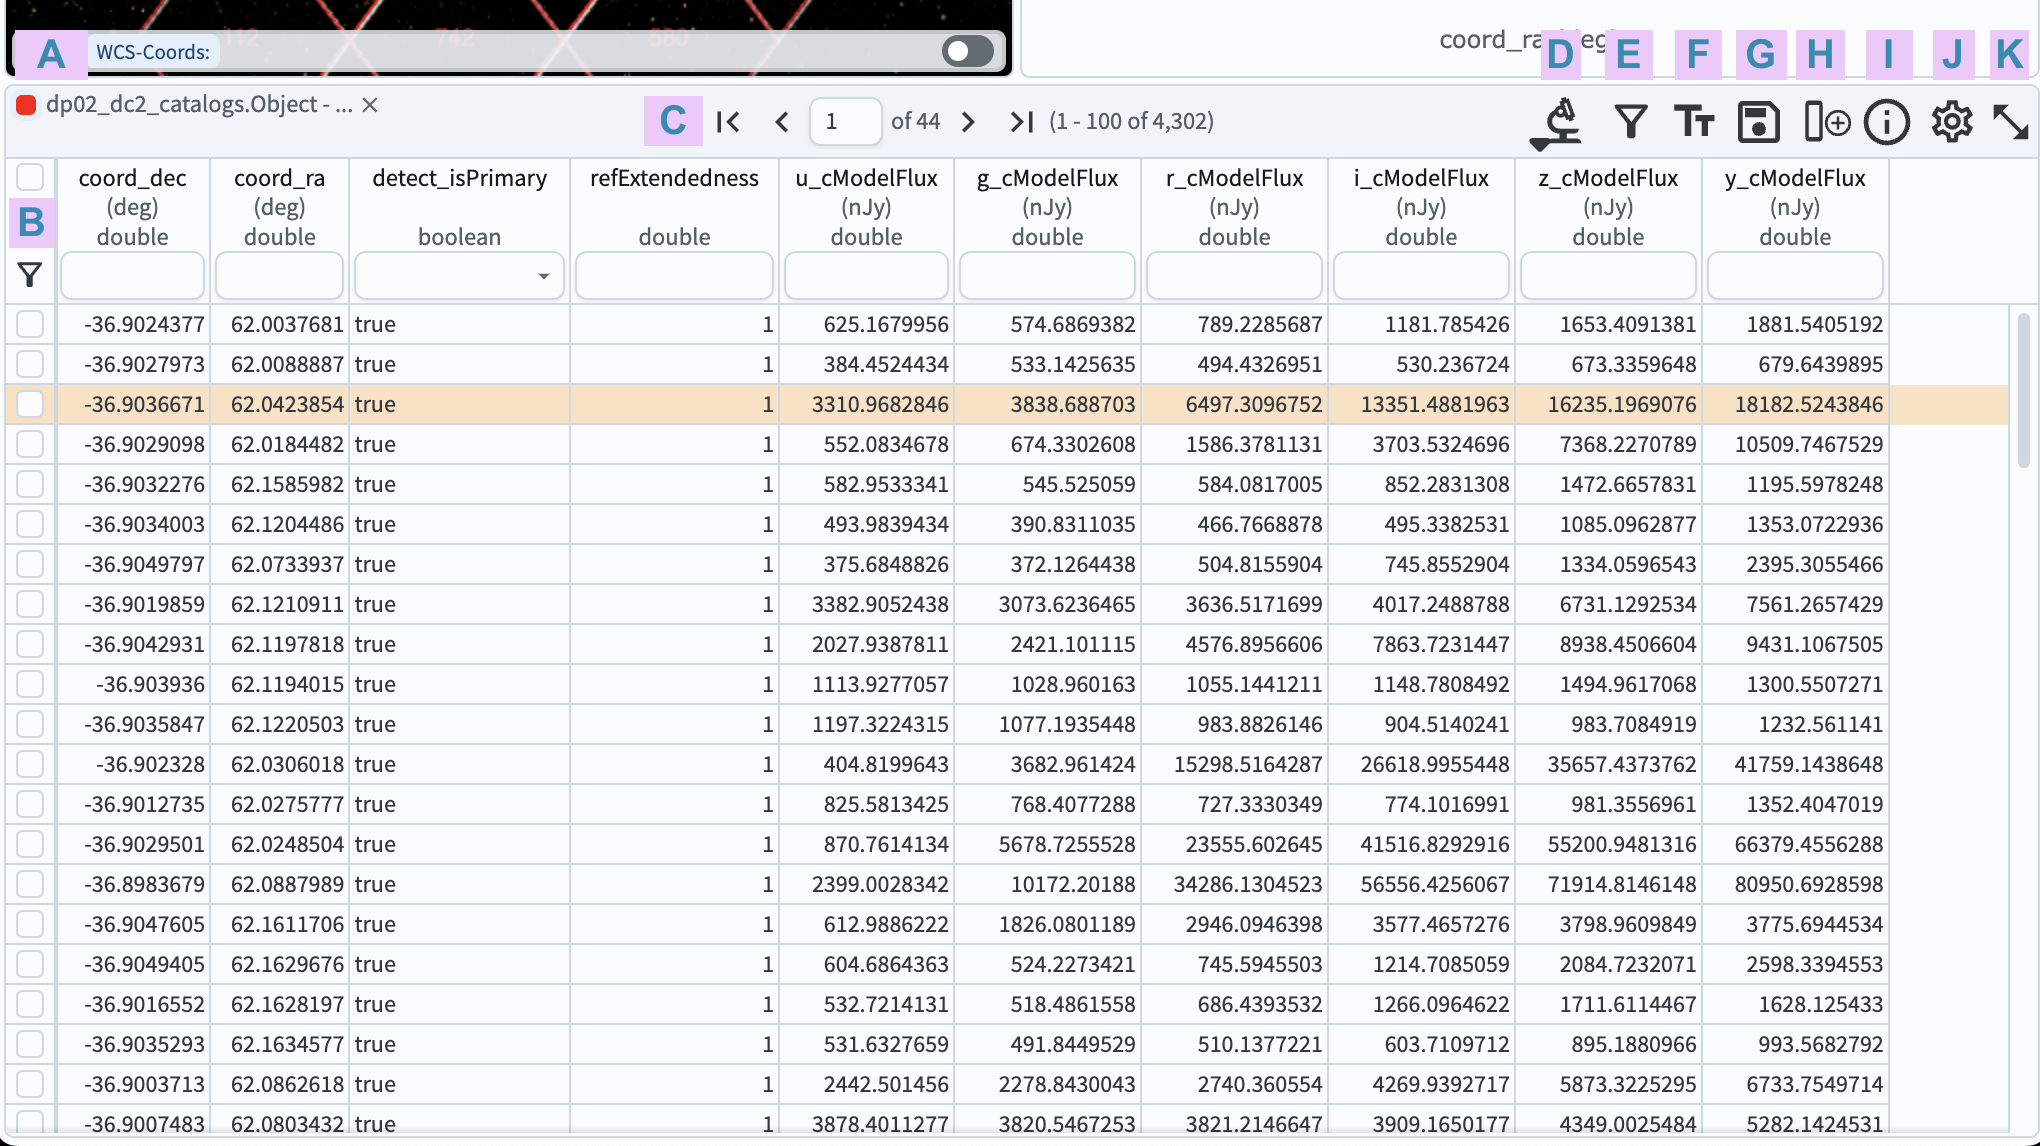
2. View the default table (Figure 1). Only one query has been executed, so there is only one tab in the table panel (A in Figure 1).

Figure 1: The table panel that results from the query in step 1. The third row has been clicked on and is highlighted orange.
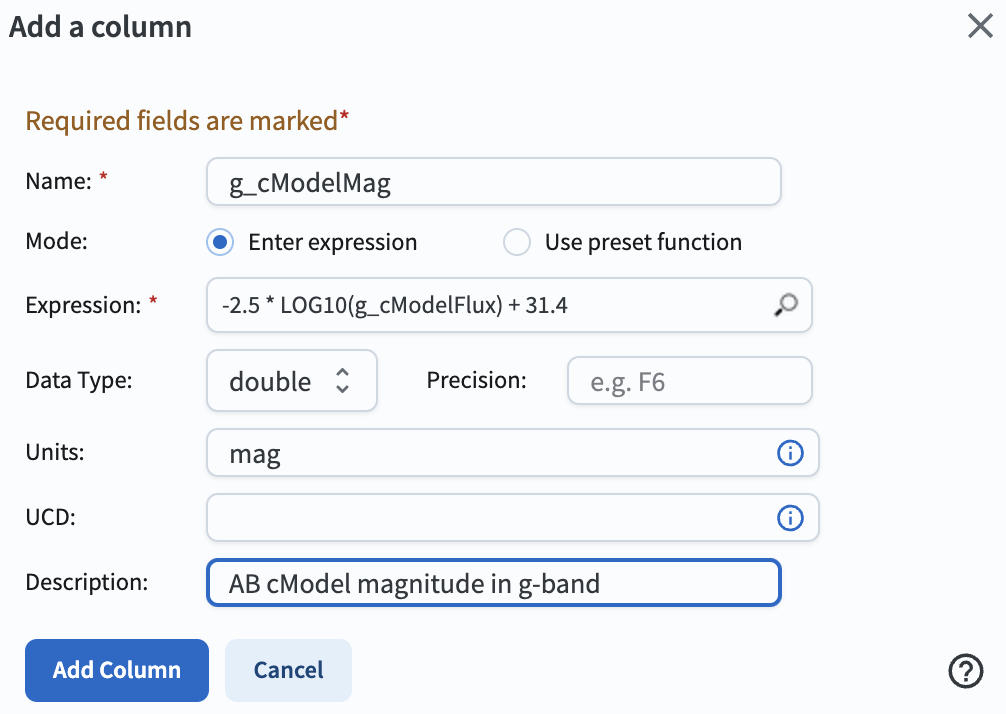
3. Open the “Add a column” window. Click on the “add column” icon (H in Figure 1) to open the pop-up window in Figure 2.

Figure 2: The pop-up window to add a new column, with entry field boxes set to define a new derived column of g-band AB magnitudes.
4. Define the new column.
New columns can only be derived from pre-existing columns using an expression.
In the pop-up window, name the new column g_cModelMag.
Use the following expression, which converts fluxes (in units of nJy) into AB magnitudes: -2.5 * LOG10(g_cModelFlux) + 31.4.
Provide the units of the new column as mag, and add a description.
Click “Add Column”, and it will appear in the table.
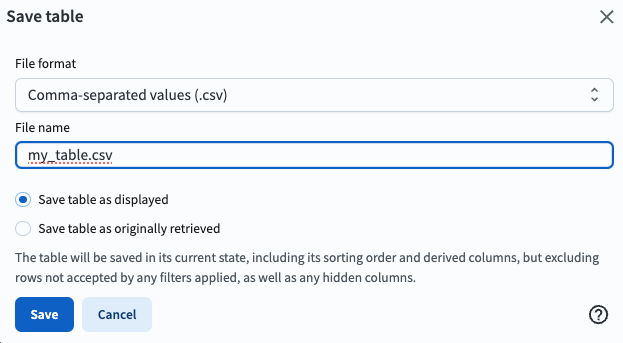
5. Option to save the table. Click on the save icon (G in Figure 1), choose a file format of comma-separated values (CSV) and name the file as “my_table.csv”. Leave the default selection of “Save table as displayed” in order to include the new derived column of g-band magnitudes, and click “Save” to download the file.

Figure 3: The pop-up window to save a table, with the selections as described in step 5.
Return to the list of DP0.2 Portal tutorials.