11. How to add layers to retrieved images
RSP Aspect: Portal
Contact authors: Yumi Choi
Last verified to run: 2025-03-05
Targeted learning level: beginner
Introduction: This tutorial demonstrates how to add layers to the active images retreived from a basic Portal query for image data.
1. Execute an Image query. Go to data.lsst.cloud , select the Portal Aspect, and click on the “DP0.2 Images” tab at the top. Enter your desired constraints for the image query, and click “Search” to execute it.
2. Explore available image layer options. Click the Tools icon (A in Figure 1) to open the drop-down menu, then mouse-over each icon in the “Layers” section (red circle in Figure 1) to see pop-up description boxes.
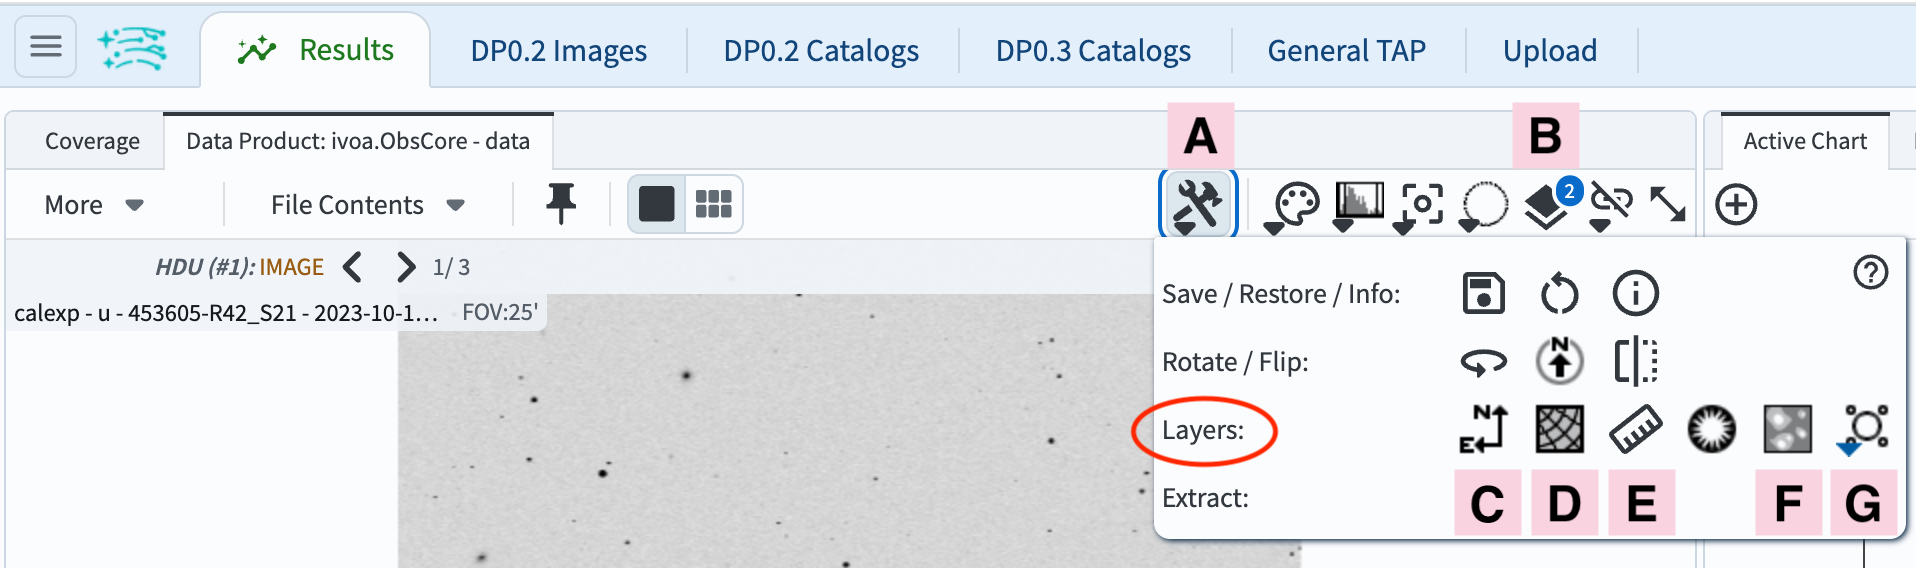
Figure 1: A screenshot of the drop-down menu under the Tool icon.
3. Add a compass. Click the north-east arrow icon (C in Figure 1). The compass will appear on the image. Change its color to purple by clicking the Overlay icon (B in Figure 1), then clicking “Color” to the right of “North Arrow”, and selecting purple.
4. Add a coordinate grid. Click the Grid icon (D in Figure 1) to display the coordinate grid on the image. Change its coordinate system to the Galactic coordinate by clicking the Overlay icon and selecting “Galactic” from the drop-down menu under “Grid”.
5. Add a ruler to measure distance. Click the Ruler icon (E in Figure 1), click a starting point on the image, and drag to an endpoint. Click the Overlay icon, check “Offset Calculation” under “Distance Tool”, and set “Unit” to degrees.
6. Add a mask. Click the Mask icon (F in Figure 1), enter “2” under “HDU Index” to use the 2nd extension of the active image file, and click OK. Alternatively, uploading a custom mask file is possible.
7. Add a marker. Click the last icon (G in Figure 1) and select “Add Marker” to place a marker at the center. Click and drag it to the lower-left corner, resize it by dragging any corner, and set its label to “object of interest”. Change the label location to “NE” from the “Corner” drop-down menu.
8. Add a footprint. Click the last icon (G in Figure 1) and select “NIRCAM” from “Add JWST footprint”. The footprint will appear in the center of the image. Move it by clicking and dragging any part of it. To rotate, click the Overlay icon and enter “45” for “Angle” under “Footprint: JWST NIRCAM”, or drag the rotate handle by 45 degrees.
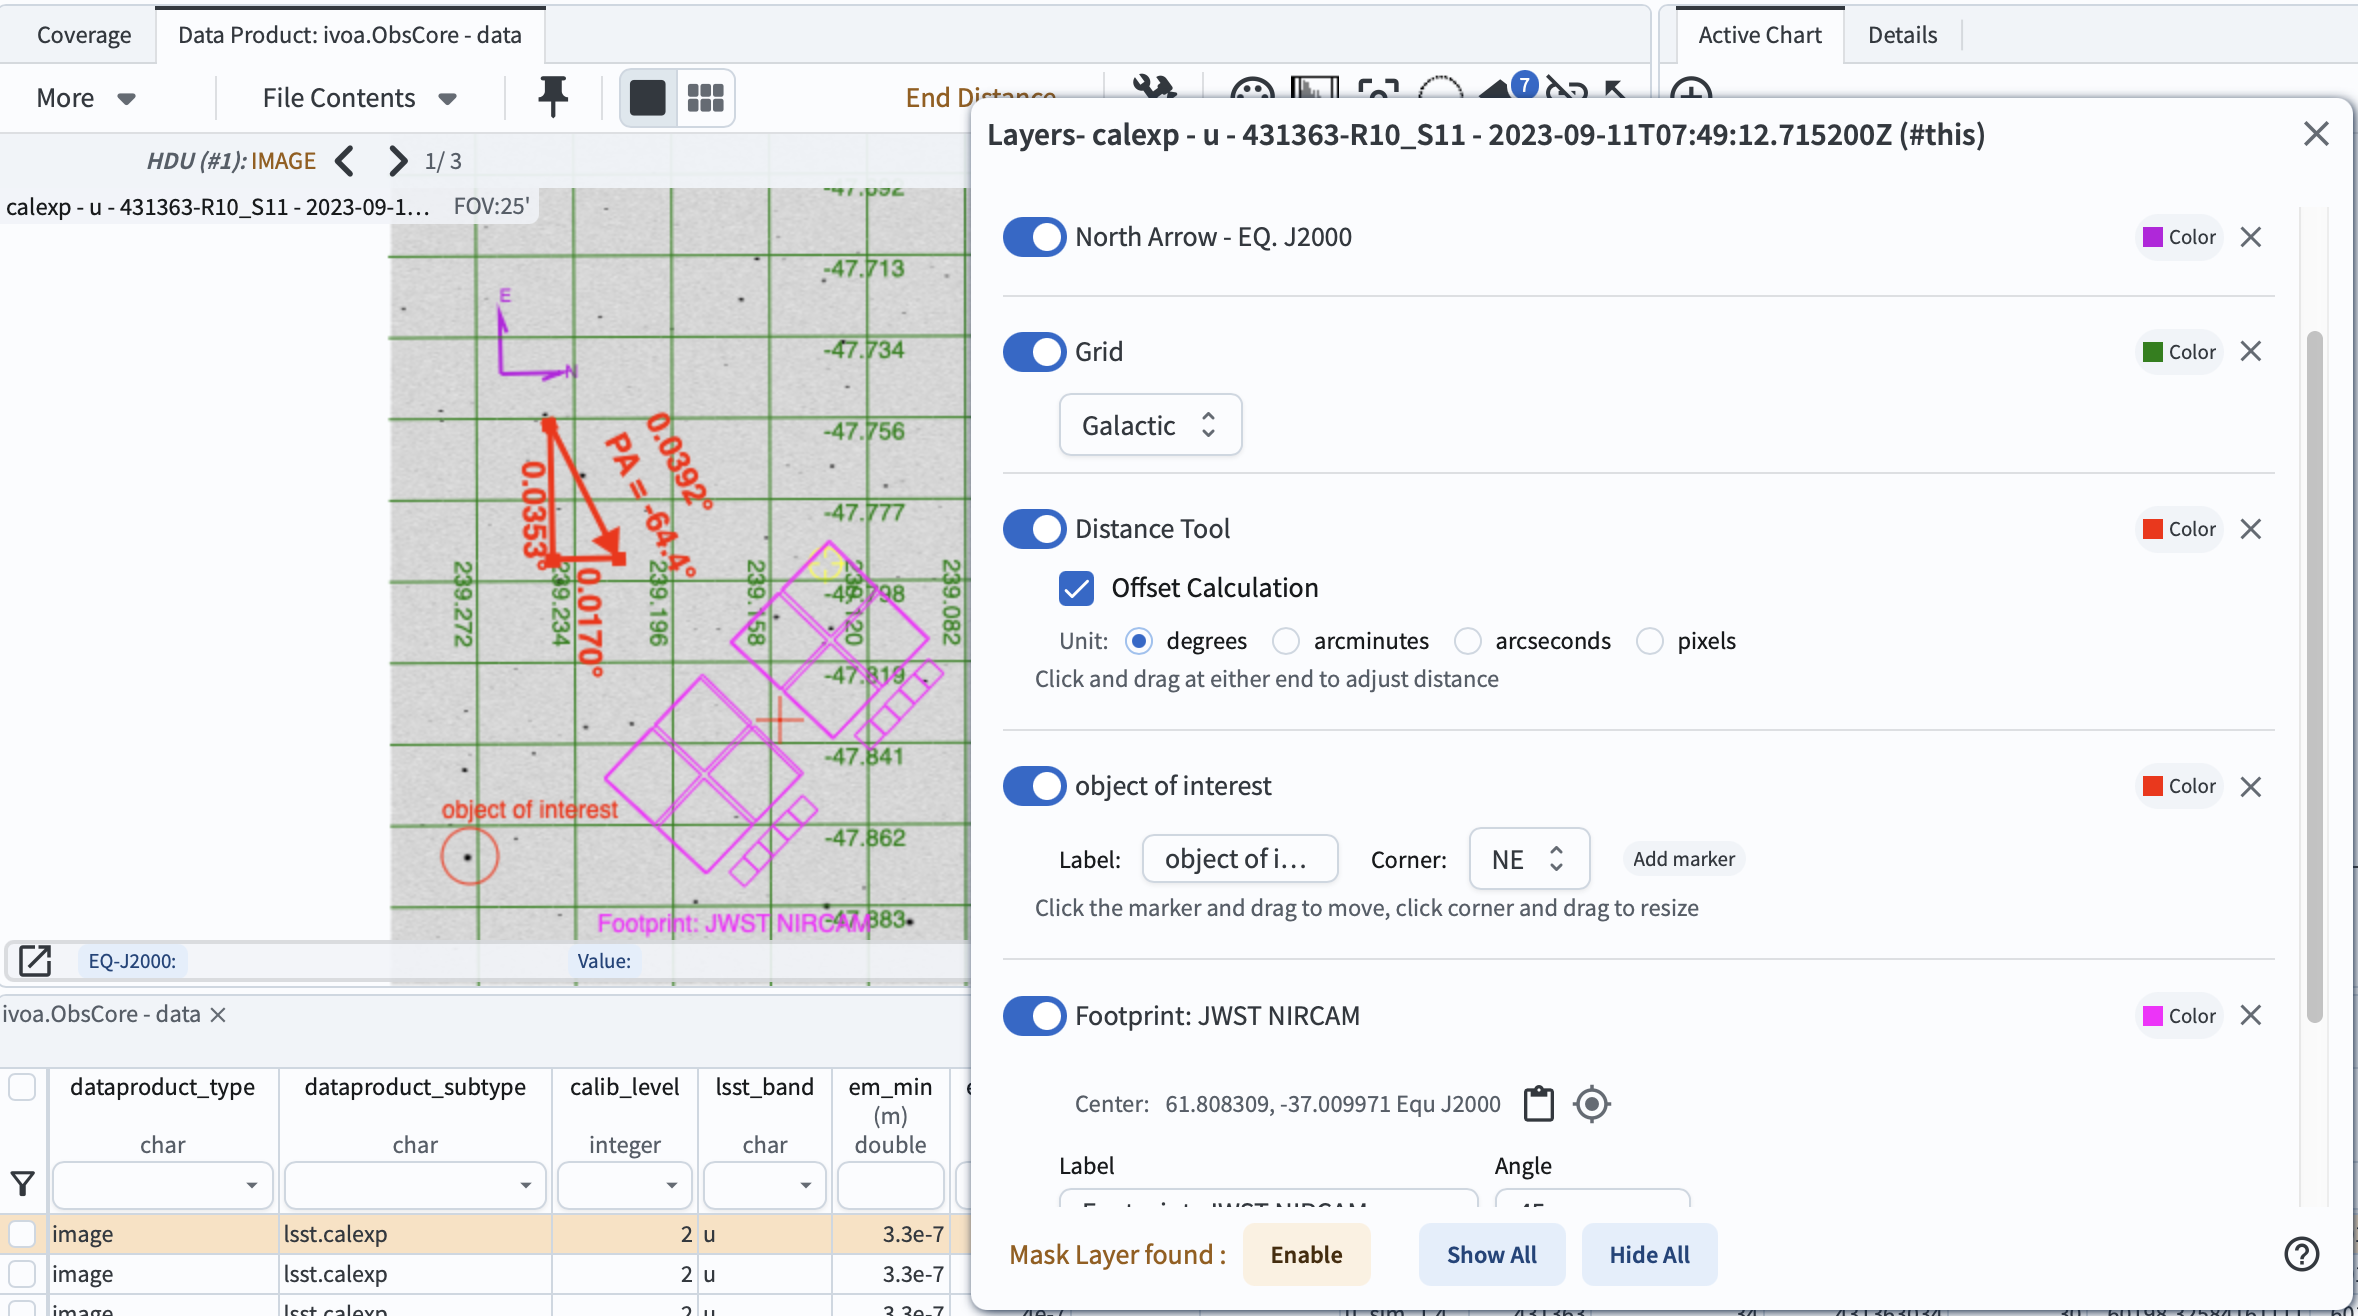
Figure 2: A screenshot of the added layers listed under the Overlay icon with layer display controls. The mask layer is removed to improve visualization clarity (see Step 9).
9. Remove a layer. To temporalily remove a layer, click the Overlay icon and toggle the sliding button next to the layer. To completely remove a layer, click the “X” next to its “Color” box.
Return to the list of DP0.2 Portal tutorials.